In this article, we will learn how we can use the temporary table as a form datasource in D365. In our scenario, we will populate the temporary table at runtime and bind it with the form datasource. firstly, we will pass an argument on the clicked event and write the form datasource init method to populate the data in it. In our scenario we will work on the CustTable form, we will populate the customer group in the temporary table which we create on the selected customer while clicking the button. Step 1: Create a new table of type TempDB and add two new fields i.e., CustGroupId and CustGroup. Step 2: We will create a new form with the pattern (List Type), then add our previously created temporary table as a datasource, and then drag both the fields CustGroupId and CustGroup on the form grid part. After the form creation, we will also create the display menu item of type form and use our form on it. Step 3: We will create an extension of t...
The purpose of this blog:
- We will add a custom field in the standard SSRS report
- We will create COC for the PSAProjInvoiceDP class to assign the custom field value
First of all, we will go through the report:
Project management and accounting -> Projects -> All projects

Action pane -> Manage -> Project invoice proposal (as well as)
Action pane -> Manage -> Invoice journal
Action pane -> Manage -> Invoice journal

This is the default format of the report and we have to remove all the marked columns from our design and add the Service date i.e., the Confirmed receipt date column in the first column of the line details as shown below:

The design of this report is:

To fulfill the above requirement we will do the following steps:
Step 1:
We will create an extension of the table 'PSAProjInvoiceTmp'. This table contains the information used in the line details section of the report. Here we add the new custom field named 'ReceiptDateConfirmed':

Step 2:
We will duplicate the 'PSAProjInvoice' report in our project and restore the datasource 'PSAProjInvoiceDS' in which the 'ReceiptDateConfirmed' field would populate

Note: The custom field is successfully added to the report datasource. Now we need to create the COC of the PSAProjInvoiceDP class.
Step 3:
We need to create COC of method initFromProjProposalItem of class PSAProjInvoiceDP to fill the ReceiptDateConfirmed field in the PSAProjInvoiceTmp table.
[ExtensionOf(classStr(PSAProjInvoiceDP))]
internal final class MDPSAProjInvoiceDP_Extension
{
    protected void initFromProjProposalItem(ProjProposalItem _projProposalItem)
    {
        next initFromProjProposalItem(_projProposalItem);

        tmpPSAProjInvoice.ReceiptDateConfirmed = SalesLine::findInventTransId(_projProposalItem.InventTransId, false).ReceiptDateConfirmed;
    }
    protected void initFromProjInvoiceItem(ProjInvoiceItem _projInvoiceItem)
    {
        next initFromProjInvoiceItem(_projInvoiceItem);

        tmpPSAProjInvoice.ReceiptDateConfirmed = SalesLine::findInventTransId(_projInvoiceItem.InventTransId, false).ReceiptDateConfirmed;
    }

}
Step 4:
After creating the COC of the PSAProjInvoiceDP class, customize the report design and add the 'Service date' i.e., the Confirmed receipt date column in the first column of the line details and remove some fields that are highlighted in the above format:
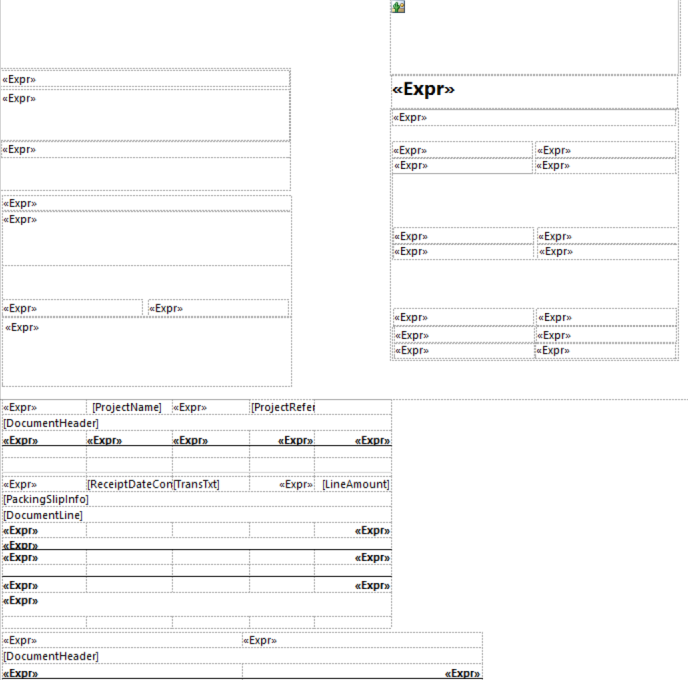
Result
The final output of our report looks like this:

Comments
Post a Comment